

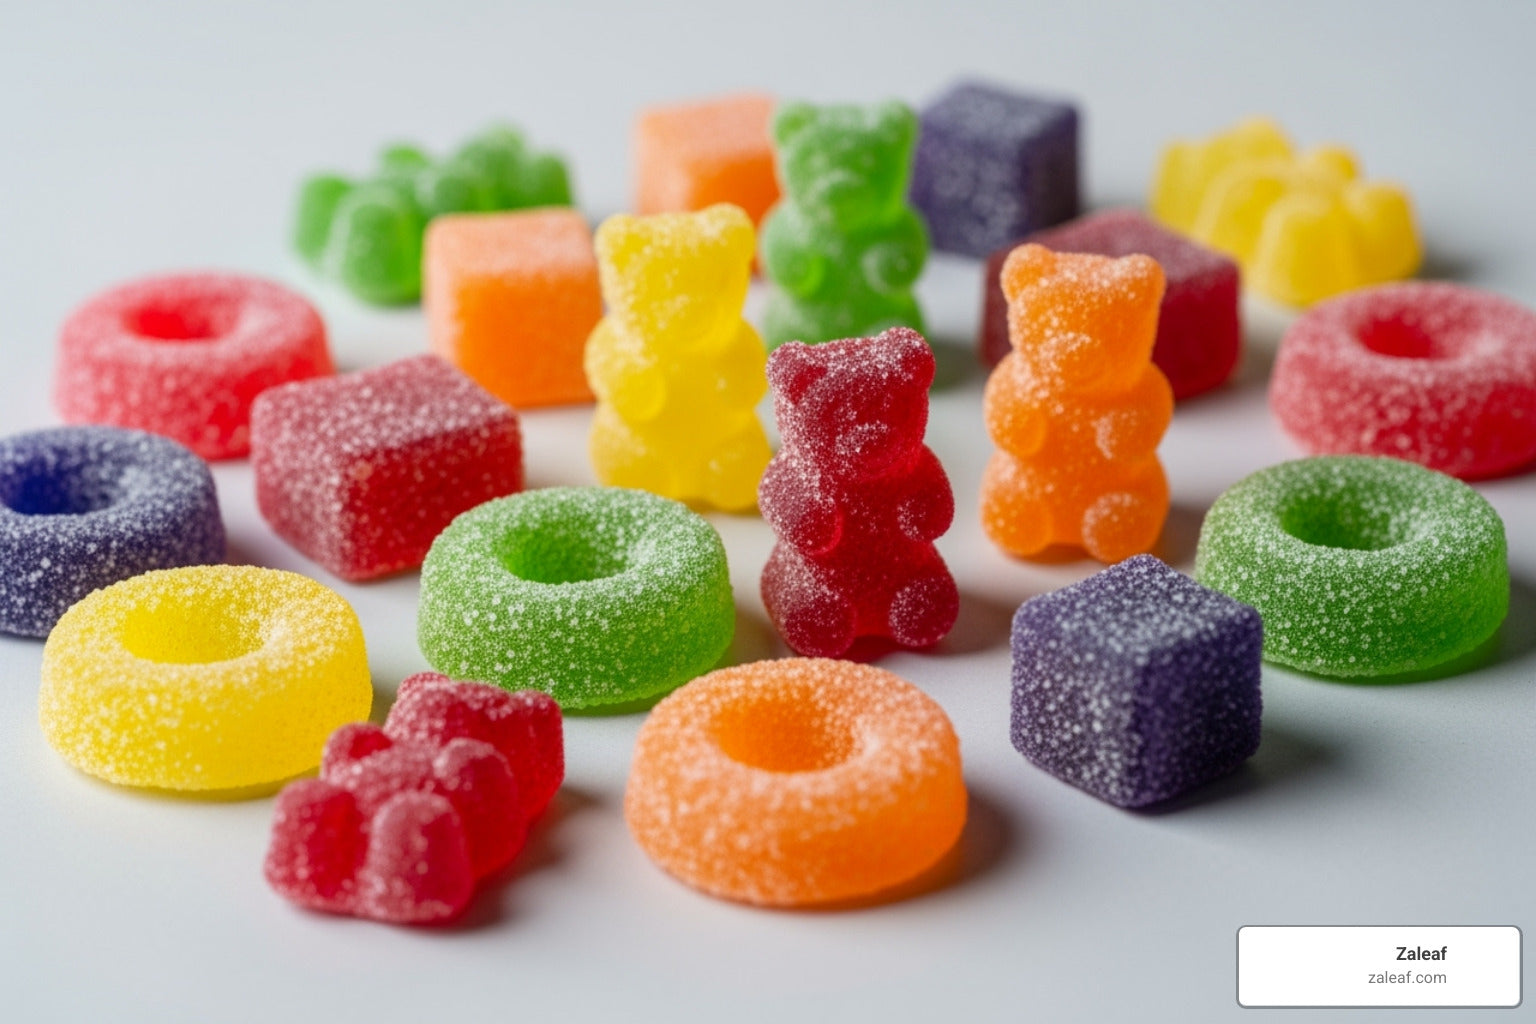
From Kitchen to Cloud Nine: Easy THC Gummy Recipes
Why Making Your Own THC Gummies is a Game-Changer
Learning how to make thc gummies at home gives you complete control over ingredients, potency, and cost while ensuring you know exactly what goes into every bite. Here's the quick overview for making THC gummies:
- Decarboxylate your cannabis flower at 240°F for 40 minutes
- Infuse coconut oil with decarbed cannabis using low heat
- Combine infused oil with gelatin, flavoring, and lecithin
- Pour into molds and refrigerate for 2-4 hours
- Store in airtight containers in the fridge for up to 2 weeks
Making homemade THC gummies isn't just about saving money - it's about crafting edibles that match your exact needs. You control the dosage, choose premium ingredients, and avoid questionable additives found in some commercial products.
The benefits are clear:
- Precise dosing control
- Cost savings over retail edibles
- Custom flavors and strengths
- Quality ingredient selection
I'm Max Shemesh, Owner & CEO of Zaleaf, and I've spent years perfecting cannabinoid formulations and helping customers understand how to make thc gummies safely and effectively. My experience scaling Zaleaf's edible product line has taught me the essential techniques that separate amateur attempts from professional-quality results.

Handy how to make thc gummies terms:
Pre-Flight Checklist: Ingredients and Equipment
Getting ready to learn how to make thc gummies? Think of this as your kitchen prep checklist – just like a pilot wouldn't take off without checking their instruments, we want everything perfectly organized before we start cooking. Trust me, there's nothing worse than realizing you're missing a key ingredient when you're halfway through the process!
Essential Ingredients
The secret to amazing homemade THC gummies starts with gathering the right ingredients. Your cannabis flower or concentrate is obviously the star of the show – this is where all your THC comes from. The quality of your starting material makes a huge difference in both potency and flavor, so choose wisely.
For your oil base, coconut oil or MCT oil work beautifully because they're packed with fatty acids that love to bind with THC. Coconut oil is my personal favorite since its high saturated fat content makes it an excellent cannabinoid carrier. MCT oil is another fantastic choice, especially if you prefer something that stays liquid at room temperature and absorbs efficiently.
Now for the gummy magic – you'll need either gelatin or agar-agar depending on your dietary preferences. Regular unflavored gelatin gives you that classic bouncy, chewy texture we all associate with gummies. If you're going the vegan route, agar-agar (made from seaweed) creates a slightly firmer, more brittle texture but works just as well. Just remember you'll typically use less agar-agar than gelatin.
Here's where many people mess up – soy or sunflower lecithin might seem optional, but it's absolutely crucial. This little emulsifier is what keeps your cannabis oil from separating from the water-based gummy mixture. Without it, you'll end up with uneven potency and potentially some gummies that pack way more punch than others.
For flavor and sweetness, flavored gelatin or fruit juice will make your gummies actually taste good. Flavored gelatin keeps things simple with built-in flavor and color, while pure fruit juice gives you more control over sugar content and natural flavors. Add your preferred sweeteners like corn syrup, honey, or agave – these don't just add sweetness but also prevent crystallization and keep your gummies perfectly chewy.
A pinch of citric acid is optional but highly recommended if you love that tart kick. Plus, it acts as a natural preservative to help your gummies last longer.
Necessary Equipment
Having the right tools makes learning how to make thc gummies so much easier and way more fun. Let's talk about what you'll actually need in your kitchen.

Silicone molds are absolutely essential – they're non-stick, come in countless fun shapes, and make removing your finished gummies a breeze. You'll also need a medium-sized saucepan with a heavy bottom for even heating, plus a whisk to thoroughly combine everything without lumps.
A dropper or squeeze bottle will save you so much frustration when filling those tiny molds precisely. Trust me on this one – trying to pour directly from the saucepan is a recipe for a sticky mess.
Don't forget your baking sheet for the decarboxylation step and later for supporting your molds in the fridge. A grinder is crucial for breaking down your cannabis flower finely – more surface area means better decarboxylation and infusion.
Your kitchen scale might be the most important tool here. Accurate measuring, especially of your cannabis, is what separates perfectly dosed gummies from unpredictable ones. Finally, grab some cheesecloth for straining your infused oil to remove any plant matter.
A quick note on legality: While we at Zaleaf offer 100% legal cannabis products with fast shipping and discrete packaging (no ID or medical card required!), homemade edible laws vary widely depending on where you live. Always check your local regulations to stay compliant. Our products undergo rigorous 3rd party testing and are designed for mood-specific effects, but when you're making edibles at home, you're responsible for knowing your local rules.
For more background on edible safety, check out our detailed guide: Cannabis edibles: are they safe or bad for you.
The Ultimate Guide on How to Make THC Gummies
Ready to transform those raw cannabis buds into delicious, potent treats? This is where the magic happens! I'm going to walk you through each step of how to make thc gummies from scratch, turning your cannabis into perfectly dosed edibles that rival anything you'd find in a dispensary.
The process might seem complex at first, but once you understand the four main steps, you'll be amazed at how straightforward it becomes. Each stage builds on the last, so take your time and follow along carefully. For additional insights into the complete process, check out our comprehensive guide: From leaf to treat: making cannabis gummies at home.
Step 1: Decarboxylate Your Cannabis
Here's something that surprises many first-time gummy makers: raw cannabis won't get you high. That's because fresh cannabis contains THCA (tetrahydrocannabinolic acid), not THC. Think of THCA as THC's sleepy cousin - it needs to wake up through heat to become psychoactive.
This awakening process is called decarboxylation, and it's absolutely essential for potent gummies. When you smoke cannabis, the flame instantly decarboxylates the THCA into THC. But for edibles, we need to do this step ourselves in the oven.
The science is fascinating: heat removes a carboxyl group from the THCA molecule, changing it into THC that can interact with your body's endocannabinoid system. Skip this step, and your gummies will be expensive, cannabis-flavored candy with no effects.
Here's how to decarb like a pro:
Start by preheating your oven to 240°F (115°C). This temperature is the sweet spot - hot enough to activate the cannabinoids but gentle enough to preserve the delicate terpenes that contribute to flavor and effects.
Break your cannabis flower into small, popcorn-sized pieces. You want them uniform for even heating, but not powdered. A coarse grind works perfectly here.
Line a baking sheet with parchment paper and spread your cannabis in a single, even layer. This ensures every piece gets the same heat exposure.

Slide that tray into your preheated oven and bake for 30-40 minutes. You'll know it's working when the cannabis changes from bright green to a light golden-brown color, and your kitchen fills with that distinctive toasted aroma.
Give the cannabis a gentle stir halfway through to ensure even decarboxylation. Once finished, let it cool completely before moving to the next step. This cooling period helps preserve those precious cannabinoids you just activated.
If you're curious about the detailed science behind this change, dive into this Scientific research on cannabinoid decarboxylation.
Step 2: Infuse Your Oil with THC
Now comes the extraction magic! Since THC is fat-soluble, we need to pull those activated cannabinoids into an oil that can later blend with our gummy mixture. This creates your cannabis-infused oil - the potent foundation of your edibles.
Coconut oil is my top recommendation because its high saturated fat content creates an excellent binding environment for cannabinoids. MCT oil is another fantastic choice, especially if you prefer something that stays liquid at room temperature.
For your oil-to-cannabis ratio, start with 1 cup of oil per 7-14 grams of decarboxylated cannabis. Less cannabis creates milder gummies, while more creates stronger ones - adjust based on your desired potency.
The slow cooker method is beautifully simple and nearly foolproof. Combine your decarbed cannabis and oil in the slow cooker, then set it to the lowest possible setting. You're aiming for a gentle 160-200°F (71-93°C) - never let it boil, as high heat can degrade your precious cannabinoids.
Let this mixture infuse for 4-6 hours, stirring occasionally. The extended, gentle heat extraction pulls out maximum cannabinoids while preserving their integrity. Your kitchen will smell amazing during this process!
If you prefer more hands-on control, try the double boiler method. Place your cannabis and oil in a heat-safe bowl over simmering water, maintaining that same 160-200°F temperature range for 2-3 hours with frequent stirring.
Straining is crucial for smooth, professional gummies. Once your infusion time is complete, let the oil cool slightly while remaining liquid. Line a fine-mesh strainer with several layers of cheesecloth, then slowly pour the infused oil through.
Gently squeeze the cheesecloth to extract every drop of that liquid gold, but don't squeeze too aggressively - you don't want plant matter sneaking through. What remains is beautifully clear, potent cannabis oil ready for gummy making.
For deeper dives into oil crafting techniques, explore Infuse and use: crafting cannabis oil for edibles and High quality highs without the smoke: edible cannabis oil picks.
Step 3: Create and Combine the Gummy Mixture
This is where your infused oil transforms into actual gummy magic! The key here is creating a smooth, perfectly emulsified mixture where every drop contains consistent THC levels.
Start by blooming your gelatin - this step prevents lumps and ensures silky-smooth gummies. Pour about 1/2 cup of cold liquid (fruit juice or water) into your medium saucepan, then evenly sprinkle your unflavored gelatin powder over the surface.
Let this sit for 5-10 minutes while the gelatin granules swell and absorb the liquid. This blooming process is like giving your gelatin a head start - it'll dissolve much more smoothly when heated.
If you're using agar-agar for vegan gummies, follow your package directions since it typically requires simmering to activate properly.
Once bloomed, add your flavored gelatin packet, corn syrup or honey, and any citric acid for tartness. Place the saucepan over low heat and whisk gently but constantly until everything dissolves into a smooth, clear mixture.
Never let this boil! High heat can break down gelatin's setting properties and potentially damage your cannabinoids. You want it warm and smooth, not bubbling.

Here's the critical moment: remove the saucepan from heat, then slowly drizzle your warm cannabis oil into the gelatin mixture while whisking vigorously. Immediately add your soy or sunflower lecithin and whisk like your gummies depend on it - because they do!
Lecithin is your secret weapon for consistent potency. This natural emulsifier acts like a molecular matchmaker, helping oil and water become best friends instead of separating. Without it, your THC oil would float to the top, creating some super-strong gummies and others with no effects at all.
Whisk for at least 2-3 minutes until you achieve a uniform, slightly opaque mixture. If you notice any oil separation, keep whisking or use a hand immersion blender briefly to ensure perfect emulsification.
For more creative edible ideas and advanced techniques, check out Sweet highs ahead: how to make edible cannabis candy and more.
Step 4: Fill, Set, and Store Your Gummies
The home stretch! This final stage transforms your liquid mixture into those perfect, chewy gummies you've been dreaming about.
Prep your workspace by placing silicone gummy molds on a sturdy baking sheet or tray. This makes transport to the refrigerator much easier and prevents spills. The beauty of silicone molds is their natural non-stick properties - no greasing required.
Work quickly but carefully when filling molds, as your mixture will start setting as it cools. Use a dropper or squeeze bottle for precise, mess-free filling. Aim for consistent amounts in each cavity to ensure uniform potency across all your gummies.
If your mixture starts thickening before you're finished, gently reheat it on very low heat while whisking constantly until it's pourable again.
Refrigeration is where the magic solidifies. Carefully transfer your filled molds to the refrigerator and let them set for 2-4 hours minimum. For best results, I recommend overnight chilling - patience here pays off with perfectly firm gummies.
Once fully set, your gummies should pop out of the silicone molds effortlessly. If they're sticking, they need more chill time.
Air-drying is optional but recommended for that authentic gummy texture. Arrange your freshly demolded gummies on a wire rack in a single layer for 12-24 hours at room temperature, flipping them occasionally. This process removes excess moisture, creating firmer gummies that won't stick together in storage.
Proper storage keeps your gummies fresh and potent. Place them in an airtight container and refrigerate immediately. This prevents mold growth and maintains both flavor and cannabinoid integrity. Properly stored homemade gummies stay fresh for up to 2 weeks in the refrigerator.
For longer storage, freeze them for several months, though the texture might change slightly when thawed. Always keep them clearly labeled and away from children and pets - these delicious treats pack a punch!
Mastering Potency and Avoiding Common Mistakes
You've learned how to make thc gummies, but mastering the craft means understanding potency and sidestepping common pitfalls. Getting the dosage right isn't just about following a recipe – it's about creating a safe, enjoyable experience that you can repeat consistently. Meanwhile, knowing how to troubleshoot problems will save you from those frustrating moments when your gummies don't turn out quite right.
The truth is, accurate dosing is probably the most challenging aspect of homemade edibles. Unlike the lab-tested products we offer at Zaleaf, your kitchen creations require some math and careful attention to detail. But don't worry – once you understand the basics, it becomes second nature. For a deeper dive into what to expect from your homemade treats, check out The ultimate guide to edible cannabis effects.
How to Ensure Accurate Dosing and Potency
This is where the science meets the art of how to make thc gummies. Unlike commercially produced edibles with clearly labeled dosages, you become the quality control department in your own kitchen. The golden rule? Start low and go slow, especially with homemade edibles.
Understanding Your Potency Calculation
Calculating the potency of your homemade gummies requires knowing a few key numbers. Don't worry – the math isn't too scary once you break it down step by step.
First, you need to know the total THC in your starting material. This depends on the percentage of THCA in your cannabis flower and how much you use. Let's say your flower tests at 20% THCA, and you use 7 grams (7000mg). That gives you 7000mg × 0.20 = 1400mg of potential THCA.
Here's where it gets interesting: after decarboxylation, roughly 87.7% of THCA converts to THC. So our example becomes 1400mg × 0.877 = 1227.8mg of active THC.
But wait – not all that THC will transfer into your oil during infusion. Home infusion efficiency typically ranges from 60-80%, so let's use 70% for our calculation: 1227.8mg × 0.70 = 859.46mg of THC in your finished oil.
Finally, divide by the number of gummies your batch produces. If you made 60 gummies, each one contains approximately 859.46mg ÷ 60 = 14.3mg of THC per gummy.
| Factor | Value (Example) |
|---|---|
| Starting Cannabis | 7 grams |
| THCA Percentage | 20% |
| Total THCA | 1400mg |
| After Decarboxylation | 1227.8mg THC |
| After Infusion (70% efficiency) | 859.46mg THC in oil |
| Number of Gummies | 60 |
| THC per Gummy | ~14.3mg |
The Art of Safe Dosing
Even with perfect calculations, testing a single gummy from your batch is crucial before diving in or sharing with friends. Wait a full two hours to gauge the effects – edibles are notorious for their delayed onset, and many people make the mistake of taking more too soon.
For beginners, we always recommend starting with just 2.5-5mg of THC. You can always take more, but you can't take less once it's in your system. Consistency is your friend here – accurate measurements of cannabis, oil, and thorough mixing (thanks to that lecithin!) ensure each gummy delivers a similar experience.
Understanding timing is just as important as dosing. Our guide The edible countdown: exactly how long your high will last helps you plan your experience, while New to thc gummies: heres how to chew wisely and chill happily offers excellent beginner-friendly advice.
Common Mistakes to Avoid When Making THC Gummies
Even experienced home cooks can stumble when learning how to make thc gummies. The good news? Most mistakes are easily fixable once you know what to look for.
The dreaded "hot spot" problem happens when THC isn't evenly distributed throughout your batch. Some gummies end up super potent while others barely have any effect. This usually stems from not thoroughly mixing the infused oil with the gelatin mixture, or worse – skipping the lecithin entirely. The fix is simple: always use lecithin and whisk vigorously for several minutes after adding your infused oil. An immersion blender can be your secret weapon for achieving that perfectly homogeneous mixture.
Sticky gummies are another common frustration. Nobody wants their treats sticking to their teeth, fingers, and storage containers. This typically happens when there's too much liquid, not enough gelatin, or insufficient air-drying time. High humidity in your kitchen can make this worse. The solution involves following your recipe's gelatin-to-liquid ratio precisely and allowing proper air-drying time on a wire rack for 12-24 hours after demolding.
Mold growth is perhaps the most disappointing mistake because it means losing your entire batch. This usually results from too much moisture, improper storage, or skipping preservatives like citric acid. Prevention is key: ensure your gummies are fully set and properly air-dried, always store them in airtight containers in the refrigerator, and keep all your equipment spotlessly clean. If you spot any mold, discard the entire batch immediately.
Texture troubles – gummies that are too hard, too soft, or unpleasantly rubbery – often come down to incorrect gelatin-to-liquid ratios or overheating your mixture. Different gelatin brands have varying bloom strengths, so some experimentation might be needed. Never boil your mixture once gelatin is added; gentle heating is sufficient to dissolve everything properly.
Separation issues occur when your infused oil floats to the top instead of staying mixed throughout the gummy base. This screams insufficient emulsification and usually means you need more lecithin (typically 1-2 teaspoons per batch) and more vigorous mixing. Add your oil slowly while whisking constantly, and don't be afraid to use that immersion blender right before pouring into molds.
The beauty of making mistakes is learning from them. Each batch teaches you something new about the process, and soon you'll be creating consistently perfect gummies that rival anything you could buy.
Conclusion
You've done it! You now know how to make thc gummies from scratch, turning your kitchen into a personal gummy paradise. From that crucial first step of decarboxylation to mastering the art of precise dosing, you've learned every technique needed to create delicious, potent edibles that rival anything you'd find in a dispensary.
The beauty of making your own THC gummies lies in the complete control you have over every aspect. You decide the potency, choose premium ingredients, and avoid questionable additives that sometimes sneak into commercial products. Plus, there's something deeply satisfying about biting into a gummy you crafted with your own hands, knowing exactly what went into every chewy bite.
But with great gummy power comes great responsibility. Always store your homemade creations in clearly labeled containers, safely away from children and pets. Remember the golden rule of edibles: start low and go slow. Give those gummies time to work their magic before reaching for another – patience is your friend when it comes to cannabis edibles.
Maybe you're reading this and thinking, "This sounds amazing, but I barely have time to make regular dinner, let alone cannabis gummies." That's totally understandable! Life gets busy, and sometimes convenience wins over DIY trips.
That's where we at Zaleaf come in. We've spent years perfecting our craft, creating 100% legal cannabis products that deliver consistent, reliable experiences every single time. Our team focuses on enhancing cannabinoid and terpene profiles to target specific moods and effects – whether you're looking to unwind after a long day or spark some creativity.
Every single product we make undergoes rigorous 3rd party testing to ensure you're getting exactly what's on the label. No surprises, no guesswork, just premium quality gummies delivered fast with discrete packaging. And the best part? No ID or medical card required – we've made the whole process as simple as online shopping for anything else.
Whether you choose the rewarding DIY path or prefer the convenience of professionally crafted edibles, we're here to support your cannabis journey. If you want to dive deeper into edibles, our Gummy goodness: the ultimate thc edibles roundup is packed with insights and inspiration.
Ready to skip the kitchen time and jump straight to the good stuff? Prefer to buy instead of DIY? Explore our lab-tested THC Gummies and find what perfectly crafted gummies taste like. Whether you're mixing, molding, or simply munching, here's to your perfect gummy experience!